
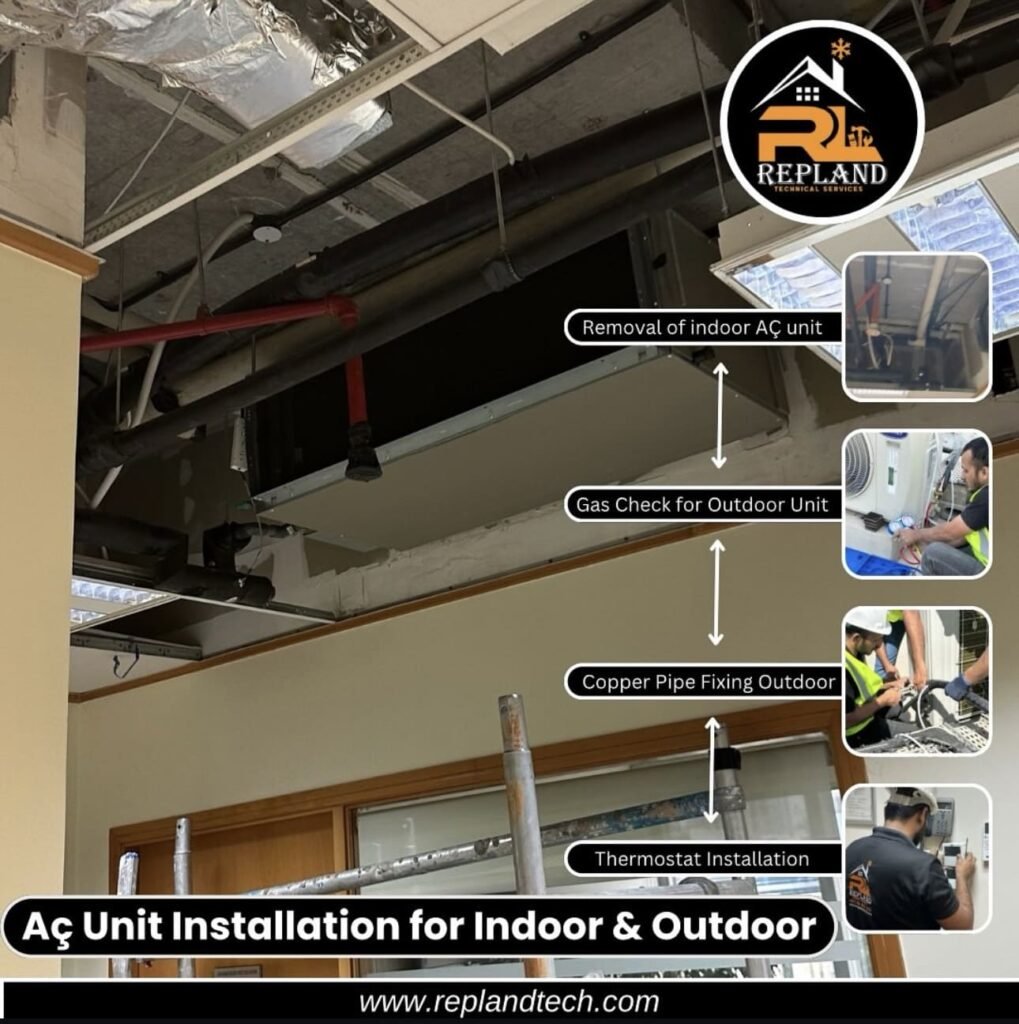
Step 1: Choose the Location for Indoor Installation:- Selecting an appropriate site for your indoor unit is crucial for achieving optimal functionality. It is important to position the unit away from direct sunlight and other heat sources to enhance efficiency. Additionally, ensure that the location is conveniently accessible for drilling a hole to connect the pipes to the outdoor unit.
For wall-mounted air conditioning systems, the recommended installation height is approximately 2.1 meters from the floor. Furthermore, it is essential to maintain a clearance of about 6-12 inches on either side of the unit to facilitate adequate air circulation and airflow.
Step 2: Install the Mounting Bracket :- Begin by placing the mounting bracket on the wall, ensuring it is level both horizontally and vertically. Once you have confirmed proper alignment, use a pencil to indicate the drilling points for the screws. After marking these locations, drill the holes and insert the plastic anchors. Finally, secure the mounting bracket by tightening the screws.
Step 3: Create an Outlet Hole:- Subsequently, you will need to create an outlet hole for the pipes to extend to the exterior. Ensure that the selected location is devoid of any concealed electrical wiring or plumbing. Using a drill or keyhole saw, make a hole approximately 7-8 cm in diameter. It is advisable to angle the hole slightly downward to facilitate proper drainage and prevent water accumulation.
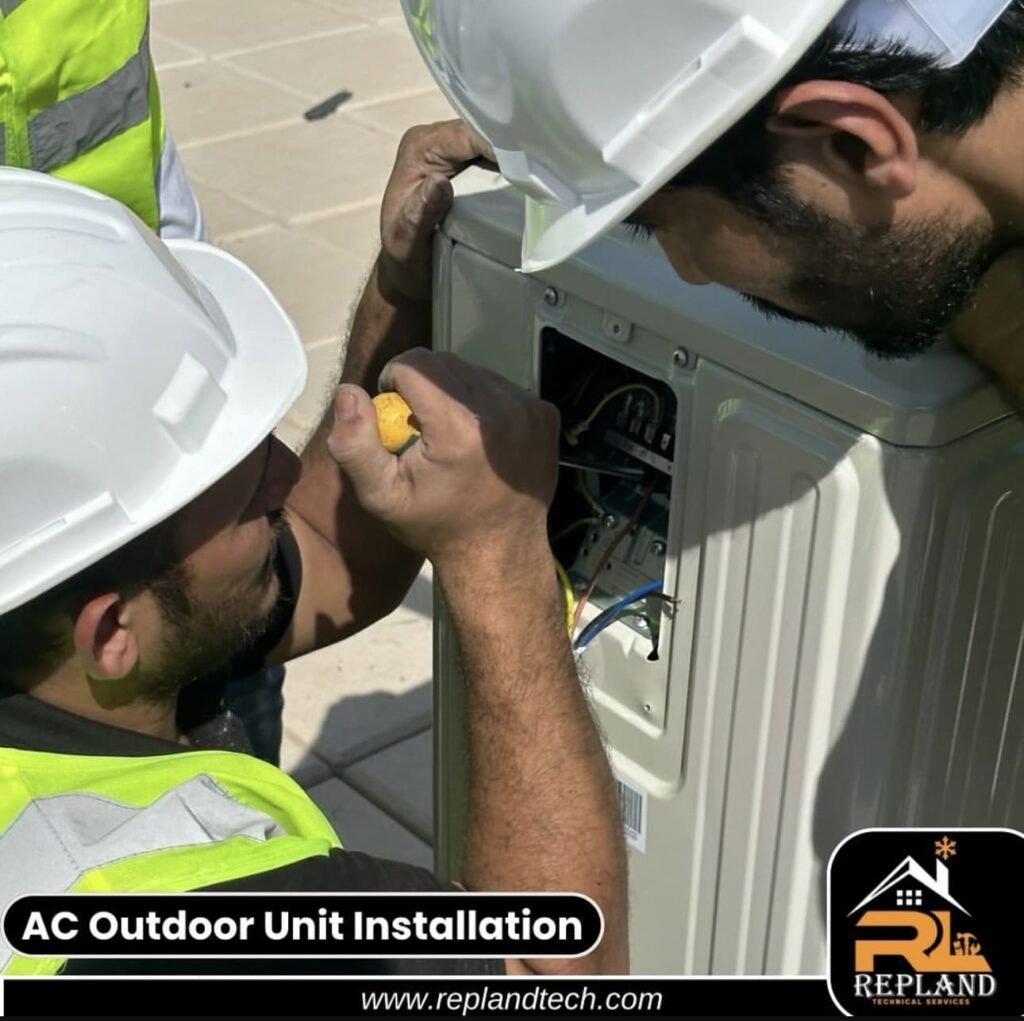
Step 4: Verify Indoor Electrical Connections:- Open the front panel of the indoor unit, remove the cover, and examine the electrical wiring. Confirm that all wires are firmly connected to the screw terminals in the correct sequence. This step is vital for ensuring stable and reliable communication between the indoor and outdoor units.
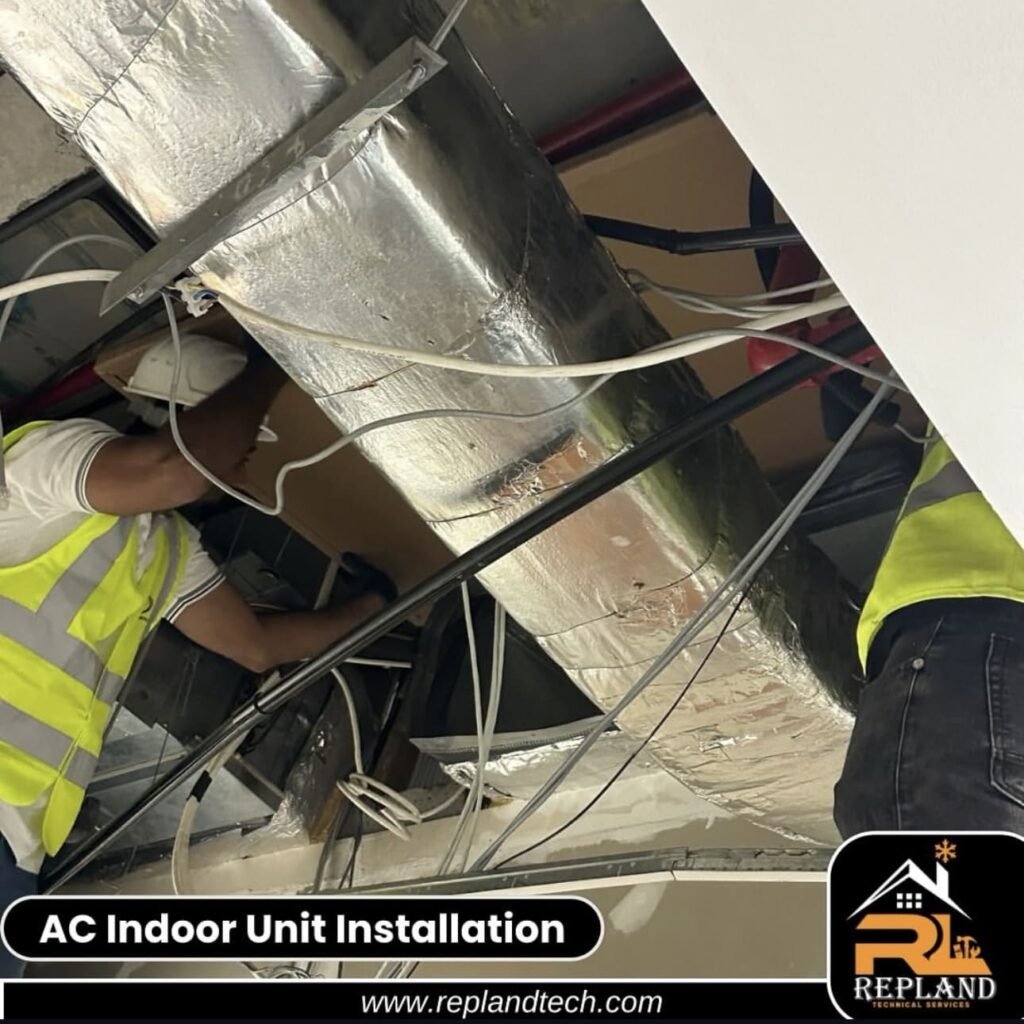
Step 5: Connect Pipes and Cables to the Indoor Unit: Pass the pipes and cables through the outlet hole created earlier. Use tape to secure the copper pipes, cables, and drainage pipe in place. The drainage pipe should be positioned at the bottom to ensure efficient water flow. Additional insulation is unnecessary, as the pipes are pre-insulated.
Step 6: Install the Indoor Unit:- With assistance from another individual, carefully elevate the indoor unit and align the connection points on its rear with the corresponding components of the mounting plate. Gently press the unit into position to ensure a firm connection. It is important to tilt the unit slightly backward, by approximately 2 to 3 degrees, to promote effective drainage of any excess water.
Step 7: Select an Appropriate Location for the Outdoor Unit:- The outdoor unit should be positioned away from direct sunlight, extreme heat, and any sources of dust or debris. It is advisable to maintain a reasonable distance, typically within 50 feet, from the indoor unit to facilitate easy connection. Additionally, ensure that the outdoor unit is situated at least 10 feet away from radio or television antennas to prevent signal interference.
Step 8: Prepare a Concrete Pad or Install Brackets on the Exterior Wall:- We have two options for the installation of the outdoor unit: either on a wall-mounted bracket or on a concrete pad. If opting for brackets, drill the necessary holes, ensuring they are horizontally aligned. If using a concrete pad, confirm that the surface is flat and stable. Avoid placing the unit directly on grass, as the ground may shift, leading to potential instability.
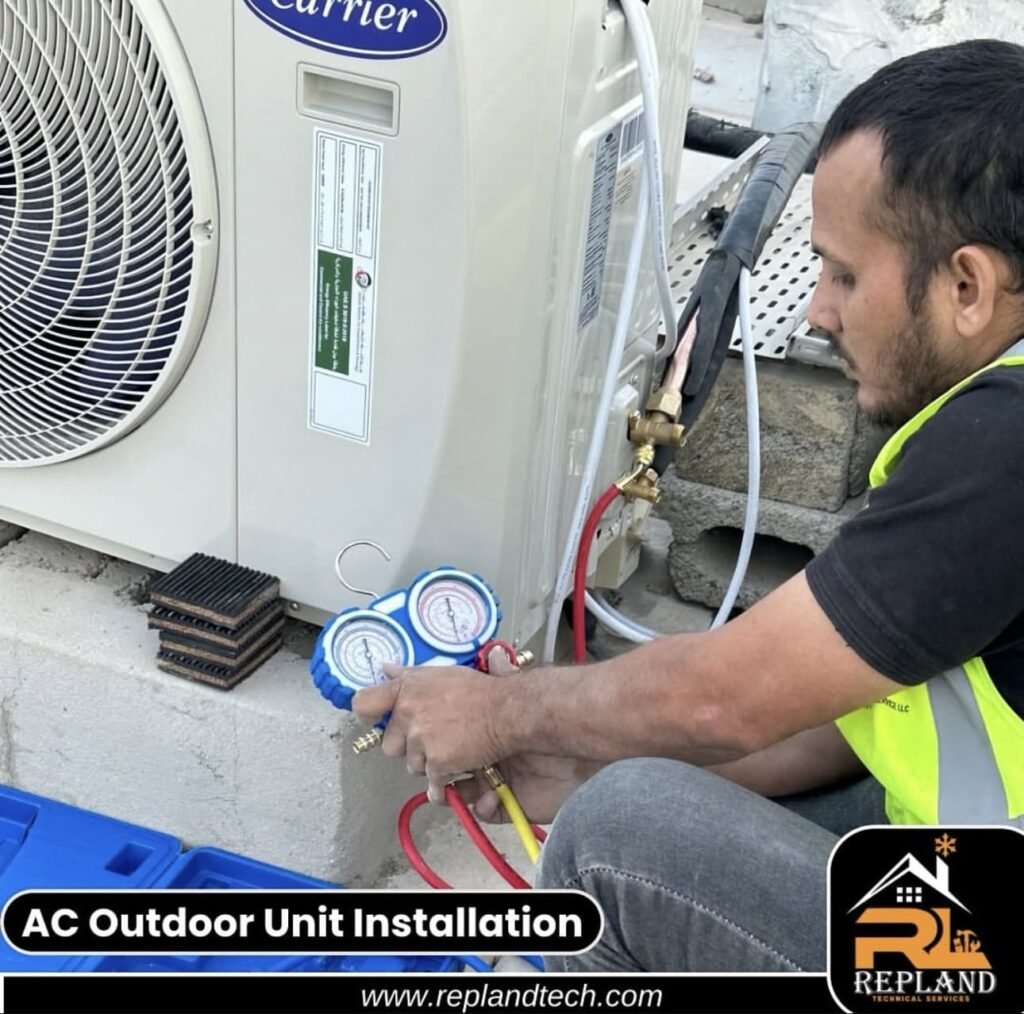
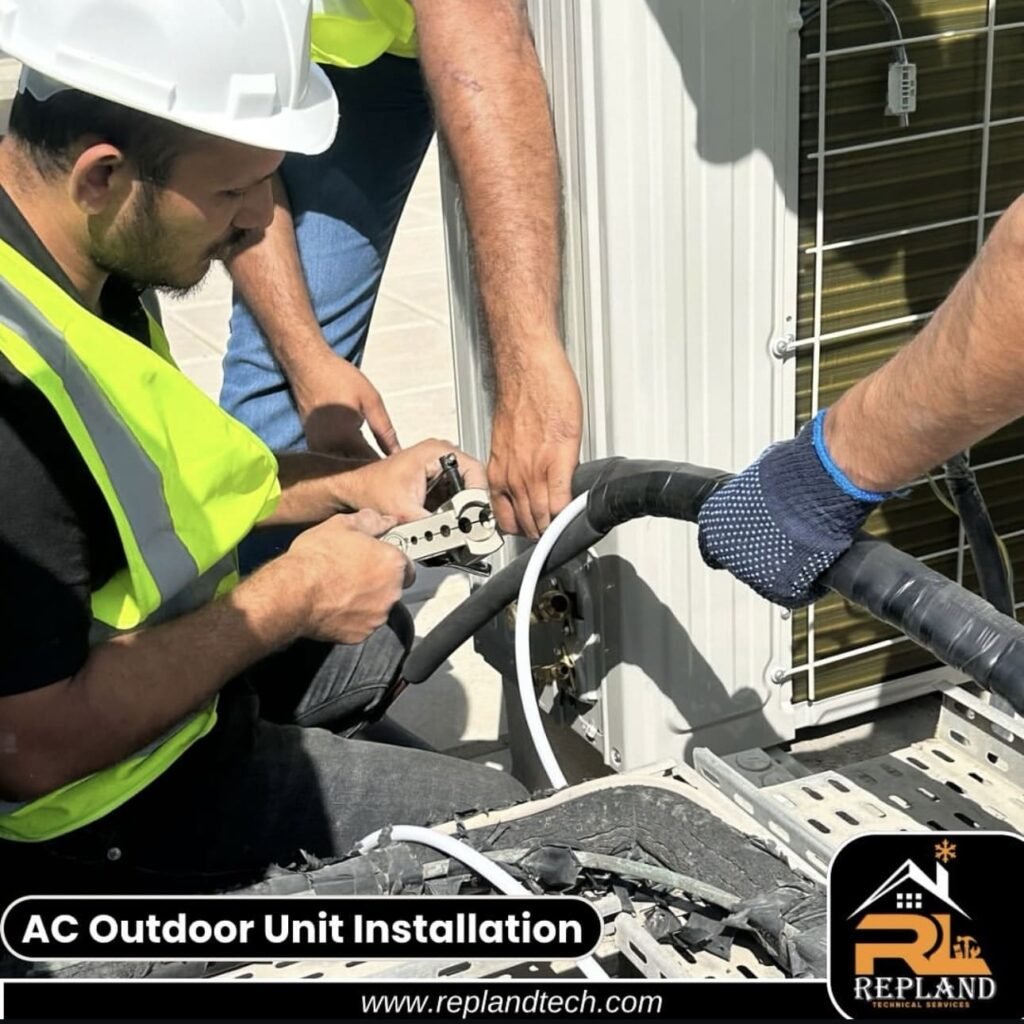
Step 9: Secure the Outdoor Unit:- For wall mounting, ensure that the outdoor unit is properly aligned with the bracket. Due to the weight of the unit, it is advisable to have a friend or family member assist in lifting it. If the unit is to be placed on a concrete pad, position a rubber cushion underneath to absorb vibrations and secure the unit with anchor bolts for added stability.
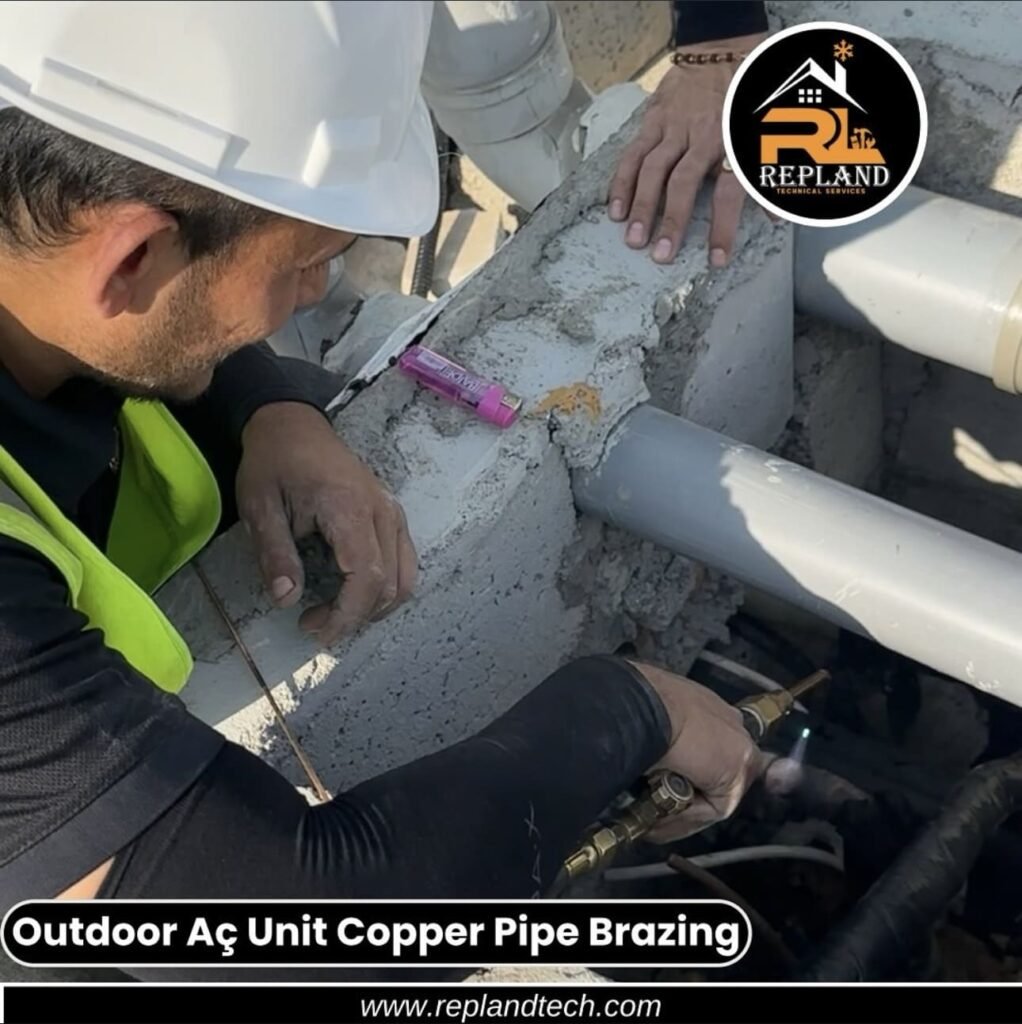
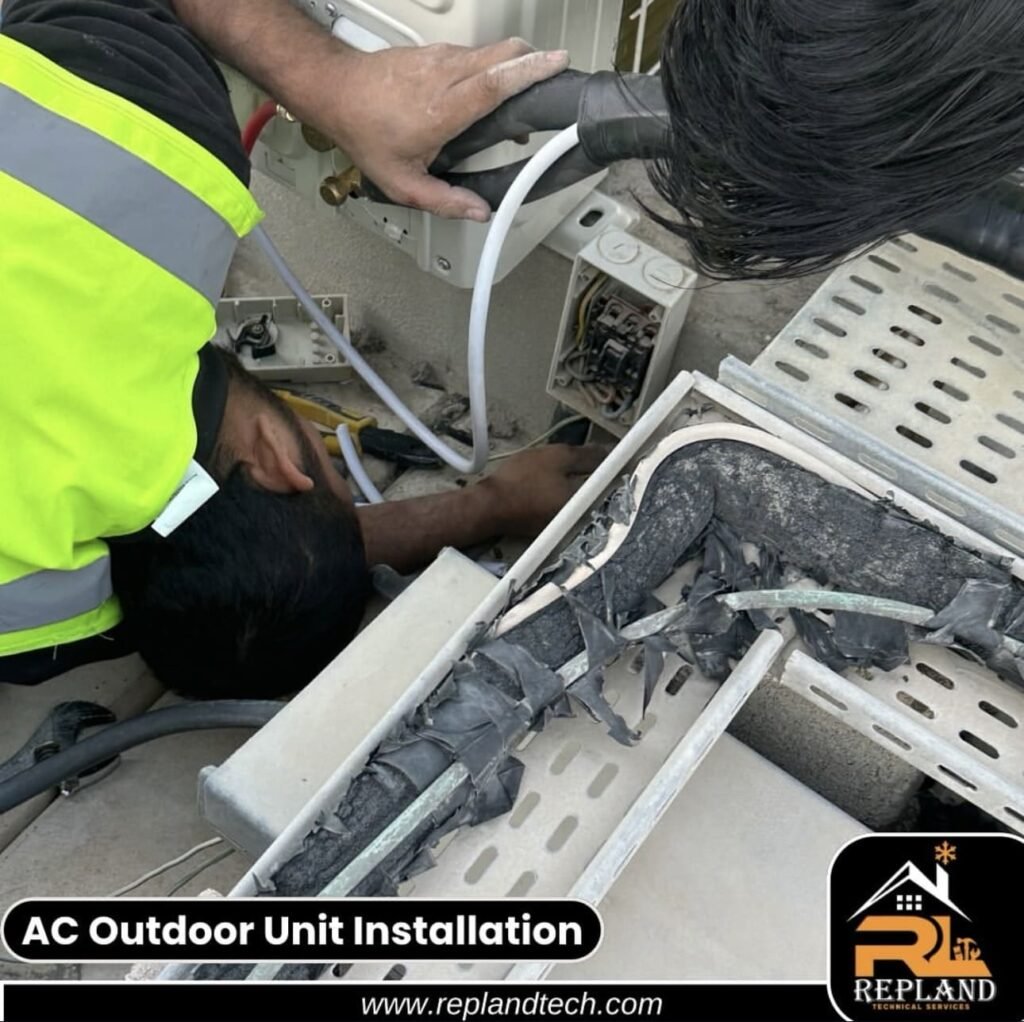
Step 10: Connect the Electrical Wires and Piping:- Open the electrical port covers on both the indoor and outdoor units. Refer to the connection diagram to wire the units accurately. For the copper pipes, use flare nuts to secure them, ensuring a leak-free connection. Finally, connect the power supply to the appropriate outlet.
Finalizing the Installation:- After completing the installation, it is essential to conduct a thorough final inspection. Remove any air from the refrigerant circuit, fasten the piping with appropriate clamps, and seal the wall opening using polyurethane foam. By adhering to these guidelines, your air conditioning installation should be executed without any issues.

Repland Tech is one of the top cleaning & maintenance services company in Dubai, UAE, because we provide some of the best services that set us apart from other home maintenance companies in Dubai.